
How to make a Battenberg cake
As part of my 30 Before 30 challenge, I’ve set myself the challenge of taking my baking skills to the next level by learning five more complicated recipes. One was Battenberg cake – a favourite – which I made yesterday with a reasonable degree of success. After scouring the internet for a recipe that didn’t look too insanely difficult, I settled on one from the BBC Good Food website, by the Hairy Bikers.
You will need
- 175g golden caster sugar
- 175g softened butter (I used unsalted)
- 175g self-raising flour
- Half a teaspoon of vanilla extract
- 3 eggs
- Red or pink food colouring
- 500g marzipan
- 6 tablespoons of apricot jam
- 2-3 tablespoons of icing sugar
Step 1
Preheat the oven to 190 degrees (375F/gas mark 5). Start by lining the tin. It should be 20cm by 20cm square, and you’ll make life a lot easier for yourself if you did what I did and buy a loose-bottomed one. Grease the tin with butter and then line with baking parchment with a 3-inch fold down the middle, like this:

You can get the fold by cutting a piece of baking parchment to about 30 x 20cm, folding it in half, and then making folds three inches down from either side of the centre line. This allows you to cook the two colours of batter alongside each other.
Step 2
The recipe said to blend the sugar, butter, eggs, flour and vanilla extract in a food processor until well combined. This is all very well if you have a food processor, but, much as I covet a gleaming red KitchenAid, I do not have one. So I used my usual Victoria sponge technique, which is to cream the butter and sugar together, then mix in the eggs one at a time with a spoonful of flour with each egg. Finally, mix in the rest of the flour and the vanilla extract.


Step 3
Now you need to divide the batter in two and put one half aside in another bowl. The recipe advised using scales to ensure an even division, but I only have the old-fashioned balancing scales, which wouldn’t have been much help. Anyway, in the remaining half of the batter, put a few drops of pink or red food colouring and mix in well. I advise putting just a couple of drops in and gradually increasing the amount of food colouring until you get the shade of pink you want. Then spoon the two batters into either side of the tin.

Step 4
Cook in the centre of the oven for about 25 minutes, or until the cakes have risen and a cake tester comes out clean. The two sides will look more or less the same when they come out the oven, but underneath the surface they’re still different colours. Unfortunately, as you can see below, I had a bit more pink cake than the other, which meant that the two sides cooked at different speeds and I had a small, slightly undercooked bit in part of the pink cake. This wasn’t too much of an issue because I was able to cut around it, but it’s something to bear in mind when you’re dividing the batter in two.

Step 5
Allow the cake to cool for ten minutes in the tin, then turn out and put them on a cooling rack. The loose-bottomed tin worked really well, so all I had to do was balance the tin on a jam jar and the side came away instantly.
When the cake is completely cool, put one on top of the other and carefully slice all the crusty bits off the edges until the two cakes are the same size. Then cut down the middle of each so that you have four rectangular strips, two pink and two normal/yellow. You may need to do a bit of trimming to ensure that they’re all the same size. You can see the unfortunate little squidgy bit in the middle of one of the strips of pink, but I actually found that because I had enough pink I substituted this one with a bit from nearer the edge.

Step 6
Heat the apricot jam in a saucepan until runny. The recipe said to put it through a fine sieve, but there’s enough runny stuff that you don’t need to bother with this. Use a pastry brush to brush jam onto the long side of one of your cake pieces, and then stick a contrasting colour piece to it.


Keep repeating this process until your cake is assembled.


Step 7
Sprinkle your worktop surface with icing sugar and roll out the marzipan. This should be big enough to cover all four sides of the cake (not the ends), or about 40 x 20cm. I found I had too much marzipan, but that’s fine because I simply trimmed the rest off with a knife once the cake was covered.

Brush the visible three sides of the assembled cake with apricot jam and then cover with the marzipan. Lift it up, brush the bottom with jam and then tuck the marzipan underneath, pressing the join gently to ensure it sticks together.
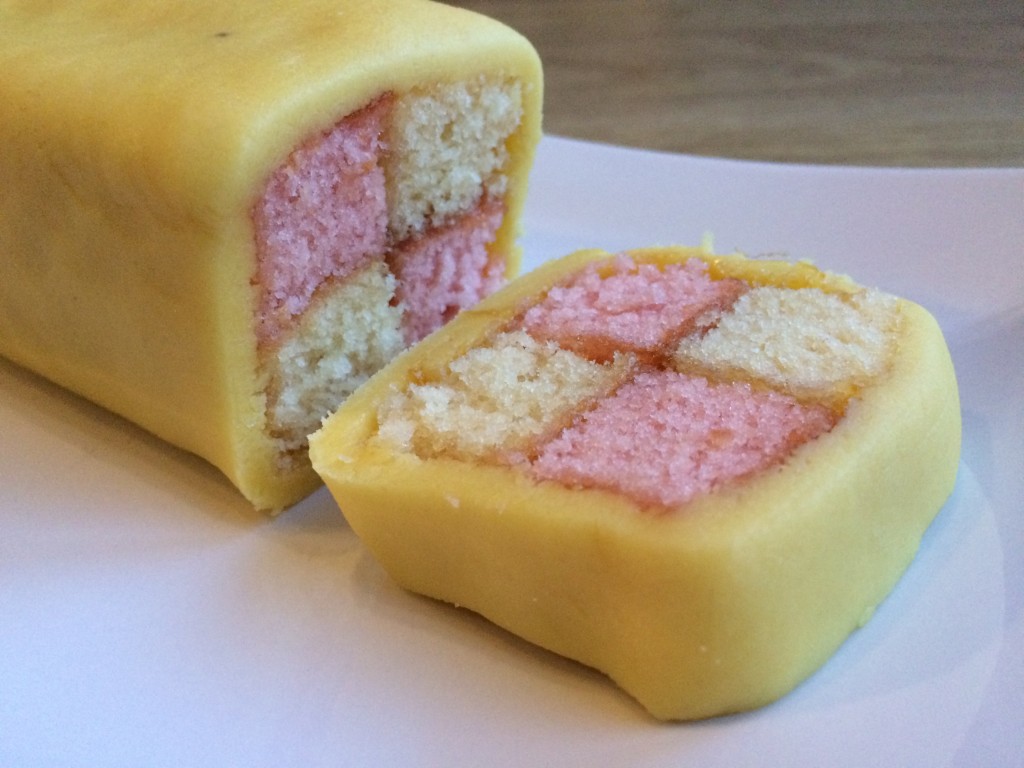
Et voila! A glorious Battenberg cake is ready for eating (and showing off on Instagram of course!).
